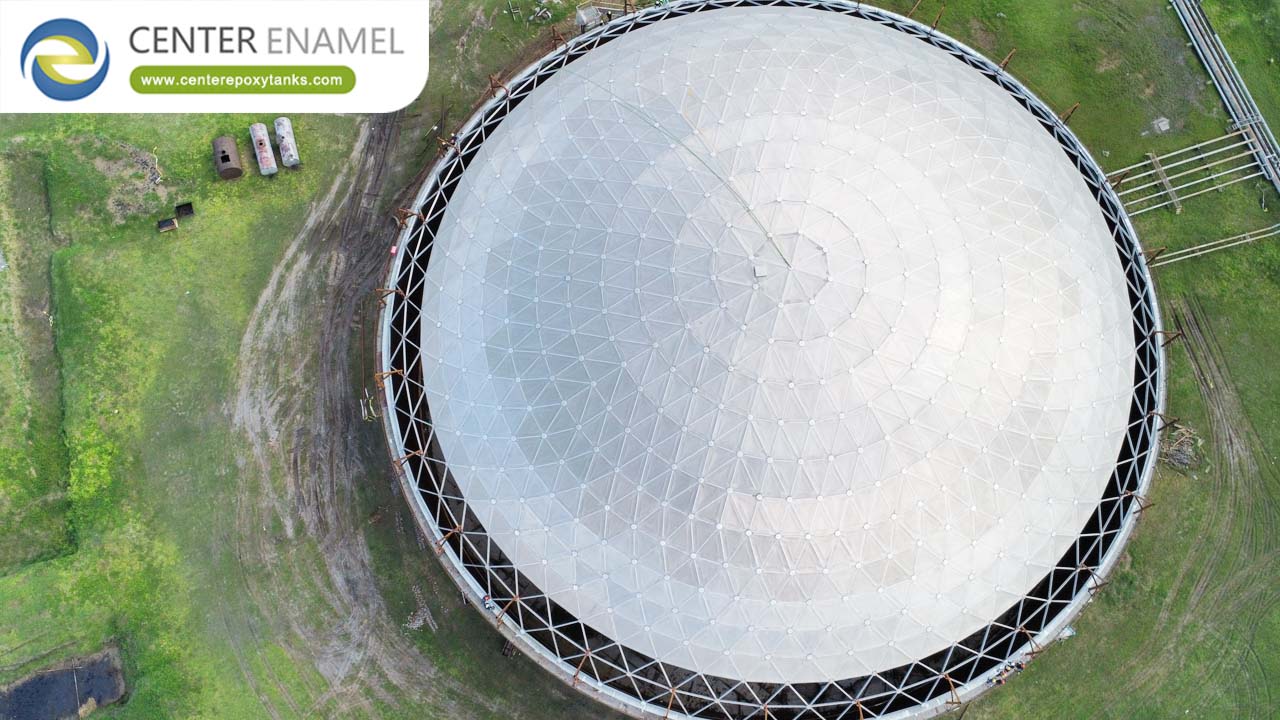
Comprehensive Installation Guide: Aluminum Geodesic Dome Roofs
The installation of an Aluminum Geodesic Dome Roof is a precision engineering process that demands rigorous adherence to structural safety protocols and geometric accuracy. As a global manufacturer with expertise spanning industrial, municipal, and wastewater infrastructure projects since 2008, Shijiazhuang Zhengzhong Technology Co., Ltd (Center Enamel) defines the industry standard for safe, efficient, and code-compliant dome assembly.
This guide outlines the professional workflow for assembling a clear-span geodesic dome, designed to meet international standards such as API 650 Appendix G and AWWA D108.
1. Pre-Installation Preparation & Logistics
Before breaking ground, ensure the site is prepared for efficient modular assembly.
● Staging Area: Clear a large, level staging area adjacent to the tank for organizing pre-fabricated struts, hubs, and aluminum panels.
● Equipment Checklist:
○ Crane or boom lift (capacity rated for dome weight).
○ Torque wrenches (calibrated for specified bolt tensions).
○ High-access scaffolding or man-lifts.
○ Fall protection and PPE (mandatory for all height work).
● Safety Review: Conduct a site-specific safety briefing to address hot-work (if applicable) and fall hazards. Note: Aluminum dome assembly is a cold-work process, eliminating the need for on-site welding.
2. Installation Workflow: The Step-by-Step Assembly
The geodesic structure relies on a precise "Hub-and-Strut" geometry. Following this sequence ensures structural load-bearing integrity.
Phase 1: Perimeter Tension Ring Installation
1. Setting the Foundation: Install the perimeter tension ring onto the tank rim. Ensure the tank rim is level to within tolerance.
2. Anchoring: Secure the tension ring according to the structural design, ensuring the anchor bolt patterns align with the tank shell attachments.
Phase 2: Hub and Strut Lattice Assembly
1. Starting Point: Begin at the perimeter tension ring and install the first layer of hubs and struts.
2. Geometry Build: Work in a concentric pattern moving upward. Connect the primary structural aluminum struts to the central hub points using heavy-duty structural fasteners.
3. Torque Control: Tighten all bolts to the project-specified torque values immediately upon connection to ensure the lattice maintains its geometric stability during the build.
Phase 3: Skin and Panel Attachment
1. Panel Positioning: Once the lattice is structurally stable, attach the aluminum closure panels to the framework.
2. Sealing & Gaskets: Install high-performance, UV-resistant gaskets between the panels and the struts.
3. Batten Bar Locking: Secure all panels with batten bars. This creates an interlocking system that ensures total watertightness and resists high-wind uplift.
3. Quality Control & Inspection Standards
Professional installation requires rigorous verification to ensure a 30+ year service life.
● Geometry Verification: Periodically check the dome’s radius at multiple points during assembly to ensure the geodesic curve is not deviating from the design model.
● Watertightness Test: After panel installation, conduct a localized or full water-spray test on seams to verify seal integrity.
● Fastener Inspection: Perform a 100% torque audit on critical connections, particularly at the perimeter tension ring and primary load-bearing hubs.
Installation Summary Table
Phase | Critical Activity | Key Requirement |
Phase 1 | Perimeter Tension Ring | Must be level and fully anchored. |
Phase 2 | Lattice Assembly | Strict torque control on all hub fasteners. |
Phase 3 | Skin Attachment | Ensure proper gasket compression. |
Phase 4 | QC Inspection | Geometric verification & watertightness test. |
Safety and Best Practices
The transition from heavy, fixed-steel roofs to aluminum geodesic domes significantly improves safety margins on construction sites.
● Zero Hot-Work: Because no welding is required, installation can proceed even while the tank or adjacent facilities are in operation.
● Weight Management: Aluminum is lightweight, drastically reducing the crane capacity requirements compared to heavy steel roof installations.
● Modular Advantage: Panels are shipped as flat-packed modular kits, reducing on-site inventory complexity and logistics costs.
Partnering with Experience
Successful infrastructure projects—such as the 10,237m³ drinking water installation in Indonesia or the resilient pharmaceutical wastewater projects in Hangzhou—are the result of disciplined, expert-led installation.
Center Enamel provides comprehensive technical manuals, installation supervision, and on-site support to ensure your aluminum geodesic dome roof is commissioned to the highest international standards.
Contact Center Enamel today to review your project’s installation plan and receive a consultation from our specialized engineering team.